Tips to Growing Giant Pumpkins: Your Expert Guide to Monster Harvests

There’s nothing quite like stepping into the backyard to discover a pumpkin the size of a small car. For home gardeners and competitive growers alike, coaxing a squash past the 100-pound mark is a thrilling blend of horticultural skill, timing, and perseverance. While standard pumpkins peak around 10–20 pounds, giant pumpkins can tip the scales at several hundred—even over a thousand—pounds. Ready to embark on your epic pumpkin journey? Here are the premium, science-backed tips you need to grow a true gourd behemoth.

1. Select the Right Giant Variety and Quality Seed
Growing gigantic pumpkins starts with genetics. Not every pumpkin can become a chart-topping champion. Choose one of the proven “giant” cultivars bred specifically for size:
- ‘Dill’s Atlantic Giant’: The world-record variety, capable of 1,500+ pounds in optimal conditions.
- ‘Big Max’: Known for consistent 100–200-pounders and smooth, carving-friendly skins.
- ‘Prizewinner’: Vigorous vines and rapid early growth make it a favorite among contenders.
Purchase seeds from reputable suppliers who’ve hand-selected from record-setting specimens. Even within a giant variety, seed selection matters: look for seeds labeled with parent fruit weight and grower pedigree to maximize your odds.
2. Prepare Deep, Nutrient-Rich Soil
Giant pumpkins are ravenous feeders. They need a prime real estate that delivers water, air, and nutrients in abundance:
- Site Selection: Choose a sunny, wind-protected plot receiving at least 8 hours of direct sun daily.
- Soil Testing: Aim for a loamy pH of 6.5–7.0. Correct any deficiencies with lime (to raise pH) or sulfur (to lower).
- Double Digging: Loosen soil to 18–24 inches deep to encourage robust root systems.
- Organic Matter: Incorporate 3–4 inches of well-composted manure or leaf mold. This boosts moisture retention and biological activity.
- Macro-Nutrients: Pre-plant with a balanced 10-10-10 fertilizer at 2–3 pounds per 100 square feet to jump-start vine growth.
By crafting a “pumpkin buffet” underground, you set the stage for explosive above-ground development.
3. Start Seeds Indoors and Harden Off
Give seedlings a head start on spring’s cooler nights by sowing seeds indoors 3–4 weeks before your last frost date:
- Use deep pots or “jiffy” peat pellets filled with sterile seed-starting mix.
- Maintain soil warmth at 75–80°F using a heat mat for reliable germination.
- Keep seedlings under bright grow lights to prevent legginess.
- Transplant when vines are 8–10 inches long and soil temperatures outdoors consistently exceed 60°F.
- Harden off by gradually exposing plants to outdoor conditions for 7–10 days, reducing transplant shock.
Stronger transplants establish faster, giving you more growing days before the fall cool-down.
4. Provide Ample Space and Train Vines
Giant pumpkins demand real estate—a single plant can sprawl over 1,000 square feet of garden. Give each seedling:
- A 100–120 square-foot:growing area (e.g., a 10×12-foot rectangle).
- A central planting mound: build a 6-inch high, 3-foot diameter hill to promote drainage and early warmth.
- Vine Training: As vines radiate from the crown, gently redirect them in a spoke pattern—keeping primary runners straight and eliminating any that cross or crisscross. This prevents congestion and ensures sunlight reaches every leaf.
By organizing the vines, you funnel energy into the main fruit-bearing node rather than wasted, tangled growth.
5. Water Consistently with Deep Soaks
Giant pumpkins can consume upwards of 20 gallons of water per day during peak growth. Shallow sprinkler sprays cause surface crusting and uneven hydration. Instead, use:
- Soaker Hoses or Drip Lines: Lay them under mulch along vine rows and around the crown.
- Daily Moisture Checks: Probe the soil 6–8 inches deep; water when that zone feels just moist.
- Deep, Infrequent Watering: Deliver 2–3 gallons per watering point, then let the topsoil dry slightly. This encourages roots to grow deeper in search of moisture, improving plant resilience.
Uniform soil moisture prevents stress cracks in the pumpkin’s rind and supports uninterrupted expansion.
6. Fertilize Strategically: Feed for Vines, Then for Fruit
Effective nutrient scheduling is never “one-and-done.” Tailor your feeding plan to growth phases:
- Early Growth (Vegetative Stage): At 3–4 weeks after transplant, apply a high-nitrogen feed (e.g., 16-16-8) every 2–3 weeks to spur lush foliage.
- Pre-Flower & Fruit Set: Switch to a balanced 10-10-10 formula 2–3 days before pollination.
- Fruit Development: Once the pumpkin reaches softball size (4–6 inches diameter), transition to a bloom booster high in phosphorus and potassium (e.g., 5-30-30) every 10–14 days. This fortifies cell walls and supports rapid flesh expansion.
- Calcium & Magnesium: Foliar-spray a calcium nitrate solution (1 tablespoon per gallon) weekly to prevent blossom end rot and improve rind integrity. Epsom salts (1 tablespoon per gallon) can supplement magnesium if leaves show signs of interveinal chlorosis.
Keep a feeding log to correlate nutrient recipes with fruit weight gains and refine future regimens.
7. Master Hand Pollination for Optimal Fruit Set
Successful giant pumpkins hinge on precise pollination:
- Tag Female Blossoms: Mark blooms that open on cool, dry mornings—typically between 8–10 a.m.
- Collect Pollen: Early-morning male flowers are loaded with fresh pollen. Gently remove ribs to expose anthers.
- Transfer: Brush the male flower’s anthers onto the female flower’s stigma in upward strokes to ensure coverage.
- Re-Bag: Tie the female blossom closed with lightweight mesh or twist ties to prevent stray pollens from contaminating your chosen cross.
Controlled pollination not only boosts your yield but lets you track “days after pollination” (DAP) for precise growth monitoring.
8. Support, Shade, and Cradles: Protecting Your Prize
As your pumpkin bulks up, it becomes vulnerable to sunscald, bruising, and insect nibbling. Build or purchase a heavy-duty cradle:
- Cradle Materials: Use recycled rubber tire mats or custom-made plywood rings lined with landscape fabric.
- Rotation: Turn the pumpkin 90° every 1–2 days so growth is even on all sides. Mark the stem end with UV-safe paint to avoid confusion.
- Shade: Erect a shade cloth canopy on the south side during peak afternoon sun to prevent rind damage.
- Pest Barriers: Surround the cradle with sticky traps or floating row covers to deter squash vine borers and cucumber beetles.
Simple physical protection keeps your pumpkin blemish-free and helps maintain an even growth rate.
9. Prune Vigorously: Funnel Energy to Your Main Fruit
Unchecked vines can sap precious energy. Pruning key points channel resources where you want them most:
- Secondary Vines: Once you’ve set 2–3 main fruiting nodes (usually the first 3 female blossoms), prune away lateral shoots emerging from the crown.
- Non-Essential Fruit: If more than one pumpkin forms on your plant, remove extras at 2–3 inches in diameter to focus growth on a single champion.
- Vine Tips: As the main vine nears the garden edge, pinch back the final 3–4 leaves to signal the plant to divert sugars down to the fruit.
Regular pruning keeps your gourd the star of the show.
10. Prevent Pests and Diseases Proactively
Large-leafed pumpkins can be disease magnets if conditions are favorable. Stay ahead with:
- Crop Rotation: Avoid planting pumpkins in the same spot year after year to minimize soil-borne pathogens.
- Mulch & Airflow: Remove lower leaves that touch the ground and maintain a 2–3-inch layer of straw or pine bark for weed control and airflow.
- Organic Sprays: Apply neem oil or potassium bicarbonate on a 7-day schedule to control powdery mildew and aphids.
- Beneficial Insects: Encourage lacewings, ladybugs, and parasitic wasps by interplanting dill, fennel, and yarrow around the garden perimeter.
A healthy vine canopy means fewer interruptions in your pumpkin’s growth spurt.
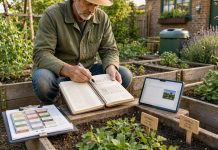
11. Monitor Growth and Keep Detailed Records
Giant pumpkin growing is part horticulture, part science experiment. Track these metrics:
- Days After Pollination (DAP): Record date of hand pollination to gauge progress.
- Circumference Measurements: Measure pumpkin girth weekly—aim for consistent daily gains (often 1–2 inches per day).
- Weather Conditions: Log daily highs, lows, and rainfall to correlate environmental effects.
- Feed and Water Logs: Note fertilizer type, rate, and watering volumes to identify what works best.
Well-kept records help you refine techniques, replicate successes, and share reliable data with the growing community.
12. Harvesting and Showcasing Your Giant
When your pumpkin tops out—either by weight, rind sheen, or the end of the growing season—harvest carefully:
- Cutting the Stem: Use a sharp pruning saw, leaving a 6–8-inch “stalk” attached to the fruit to reduce rot risk.
- Handling: Roll the pumpkin gently onto a padded tarp and hoist with a spreader bar or moving straps—never lift by the stem.
- Curing: Store in a dry, shaded spot for 1–2 weeks to harden skin and improve shelf life.
- Weighing: If competition is your goal, calibrate scales in advance and follow weigh-off rules precisely.
Then, bask in the glory of your monster creation—photos and bragging rights included.
Cultivate Your Colossal Pumpkin Passion
Growing giant pumpkins is a gratifying dance between meticulous horticulture and the unpredictability of nature. Every phase—from seed selection to final weighing—offers lessons to refine your process and chase ever-higher records. Ready to dive deeper? Subscribe to our newsletter for exclusive variety trials, nutrient recipes, and interviews with champion growers. With these tips to growing giant pumpkin in your toolkit, your next harvest could well rival the giants of state fairs and world record books. Happy growing!