To build a retaining wall that lasts, dig a trench about 18 to 24 inches wide, lay at least 6 inches of compacted crushed gravel, bury the first course of block at least 6 inches deep, and backfill a 12-inch zone behind the wall with clean drainage gravel, adding a perforated drain pipe that exits to daylight on taller or wet sites. Keep DIY gravity walls to about 3 to 4 feet including the buried course, and get an engineer and a permit for anything taller or for walls holding up a slope, driveway or structure.

Most retaining walls fail because of poor preparation, not poor blocks: weak bases, no drainage and skipped compaction. This guide covers height limits and permits, materials and costs, a step-by-step build for segmental block walls, drainage, geogrid, and how to spot and prevent failure. Always follow the installation guide for the specific block you buy.
Retaining Wall Quick Specs
| Item | Typical guideline |
|---|---|
| DIY height limit | About 3 ft for many gravity block systems; about 4 ft maximum before engineering is recommended |
| Trench width | About 18 in. for walls under 4 ft, 24 in. for taller walls, or block depth plus 12 in. |
| Trench depth | Base depth plus buried block depth (see below) |
| Base | At least 6 in. of compacted crushed aggregate, extending about 6 in. in front of and behind the block |
| Leveling layer | Up to about 1/2 in. of coarse sand, if used |
| First course burial | At least 6 in. on level ground in front of the wall; more where the ground slopes away |
| Drainage zone | Clean gravel in block cores and about 12 in. behind the wall |
| Compaction | Backfill in lifts of about 6–8 in., compacting each lift |
| Before digging | Call 811 so utilities can mark buried lines |
How Tall Can You Build a Retaining Wall Yourself?
Block manufacturers and builders broadly agree that walls over 4 feet should be engineered, and some gravity block systems set a lower limit of about 3 feet, measured from the bottom of the buried course and excluding the cap, with level ground above and no extra load. This Old House notes walls under 3 feet can often be a DIY project.
Before you build a wall, check whether plants and low terraces can do the job. See cheap ideas for landscaping a steep hillside.
Height is not the only trigger. Building codes based on the International Residential Code (section R404.4, as explained in this Los Angeles County code manual) require design for walls retaining more than 48 inches of unbalanced fill, and for walls over 24 inches that also support a surcharge, such as a driveway, a slope above, a fence or a building. Local rules vary, so check with your building department. Many cities require permits and stamped engineering above 4 feet or whenever a surcharge is present.
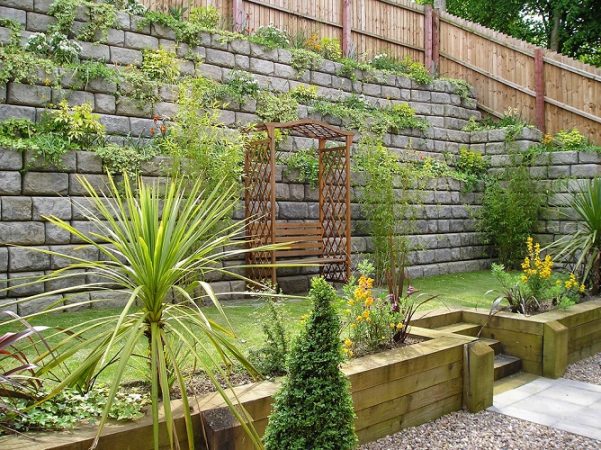
If you need more height, consider two shorter terraced walls set well apart rather than one tall wall, and get professional advice on spacing.
Retaining Wall Materials and Costs
| Material | Installed cost (per sq ft of wall face) | Typical lifespan | Pros | Cons |
|---|---|---|---|---|
| Segmental concrete block | Mid-range | Long, with proper base and drainage | DIY friendly, built-in setback, many styles | Heavy; taller walls need geogrid |
| Timber | About $15–30 | About 20–40 years | Lower cost, natural look | Eventually rots; not for tall walls |
| Natural stone | About $20–100 | About 50–100 years | Beautiful, durable | Expensive, skilled labor |
| Poured concrete | About $30–50 | About 50–100 years | Very strong, suits tall walls | Needs forms, footing and usually a pro |
| Gabion (wire baskets of stone) | About $10–40 | Varies | Drains freely, modern look | Fill settles; baskets must be sturdy |
Cost figures are national estimates cited by This Old House from Angi data. A typical professionally built residential wall costs roughly $3,200 to $9,200, with a structural engineer adding about $350 to $750 when needed. Steep or hard-to-reach sites can add significantly to labor. For a timber design, see our landscape timber ideas.
How Many Blocks and How Much Gravel Do You Need?
- Blocks: wall length (ft) × total height including the buried course (ft) ÷ face area of one block (sq ft). A standard 12 × 4 in. face block covers 0.33 sq ft; a 16 × 6 in. block covers 0.67 sq ft. Add 5–10% for cuts and breakage.
- Base gravel: length × trench width × base depth (all in feet) = cubic feet. A 20-ft wall with a 2-ft-wide, 0.5-ft-deep base needs 20 cubic feet, about 0.75 cubic yard.
- Drainage stone: length × height × 1 ft (the drainage zone behind the wall) = cubic feet. A 20-ft wall that is 3 ft tall needs 60 cubic feet, about 2.2 cubic yards.
- Caps: wall length (ft) ÷ cap length (ft), plus one or two spares.
Example: a 20-ft-long, 3-ft-tall wall (including 6 in. buried) built with 16 × 6 in. blocks needs about 20 × 3 ÷ 0.67 = 90 blocks, plus 5–10 spares.
How to Build a Segmental Block Retaining Wall
Tools and materials
- Retaining wall blocks and caps
- 3/4-inch crushed aggregate with fines for the base
- Clean crushed drainage stone (“wall rock”) for cores and backfill
- Perforated drain pipe, if needed, and landscape fabric
- Shovel, string line, stakes, 4-ft level, tape measure, rubber mallet
- Plate compactor (rentable) or hand tamper for small walls
- Masonry or concrete construction adhesive for caps
Step 1: Plan and call 811
Mark the wall line with stakes and string. Call 811 at least a few business days before digging, depending on your state, so utilities can mark lines. Confirm whether your wall needs a permit.
Step 2: Excavate the trench
Dig about 18 inches wide for walls under 4 feet, or about 24 inches for taller walls. Allan Block suggests a trench depth of about 4 inches plus 1 inch per foot of wall height for walls under 4 feet, and 6 inches plus 1 inch per foot for taller walls, plus room for the base. Remove topsoil, roots and soft spots, then compact the soil at the bottom.
Step 3: Build the base
Add at least 6 inches of 3/4-inch crushed aggregate and compact it with at least two passes of a plate compactor. Level it carefully, front to back and side to side. A level base is the single most important step; any error multiplies as the wall rises.
Step 4: Lay and bury the first course
Place the first row of blocks on the base, checking level on every block and tapping them down with a mallet. Bury this course at least 6 inches below grade in front of the wall. Where the ground slopes down in front of the wall, Versa-Lok guidance calls for burying about one-seventh of the wall height.
Step 5: Add drainage
Place a perforated drain pipe at the lowest point behind the first course when the wall is over 4 feet, uses geogrid, or sits on a wet or poorly drained site. Vent it to daylight at the ends and about every 50 feet. Fill the block cores and a 12-inch zone behind the wall with clean drainage stone.
Step 6: Stack and backfill in lifts
Stack each course with staggered joints, using the block’s built-in lip or pins for the correct setback. After every course or two, backfill and compact in lifts of no more than about 6 to 8 inches. Keep heavy compaction equipment about 3 feet back from the wall face.
Step 7: Add geogrid if required
Taller walls and walls with loads above them need geogrid reinforcement laid between courses and extended back into compacted soil. Common guidance places grid about every second course, with length around 60% of wall height for level backfill and more for sloped backfill. Follow your manufacturer’s chart or an engineer’s design.
Step 8: Cap and finish
Glue caps with beads of masonry adhesive along the front and back of the top course. Finish the top 6 to 8 inches behind the wall with soil so surface water is directed away, and plant the area to reduce erosion.
Retaining Wall Drainage: Why It Matters
Water trapped behind a wall builds hydrostatic pressure that pushes the wall forward. Drainage stone, a properly placed perforated pipe and surface grading that sends rain away from the top of the wall prevent this pressure from building. This Old House recommends wrapping the perforated pipe in filter fabric and surrounding it with gravel to keep soil from clogging it.
Retaining Wall Problems: Symptom, Cause and Fix
| Symptom | Likely cause | What to do |
|---|---|---|
| Wall leaning forward | Water pressure, poor base or wall too tall for its design | Have it evaluated; often requires rebuilding with drainage or reinforcement |
| Bulging in the middle | Saturated backfill or poor compaction | Improve drainage; rebuild the affected section |
| Cracked or separated blocks | Settling base or frost heave | Check for soft base and water problems before repairing |
| Soil washing out at the base | No filter fabric or inadequate drainage stone | Add fabric and clean stone behind the wall |
| Water pooling above the wall | Grading slopes toward the wall | Regrade or add a swale to direct water away |
If a wall is leaning noticeably, holds up a driveway or structure, or is near a property line, consult a licensed contractor or engineer rather than attempting repairs yourself.
Planting Around a Retaining Wall

Plants soften a wall’s look and help hold soil above it. Trailing perennials can spill over the top, while low shrubs and groundcovers in front hide the base. Keep large trees well away from the wall, since roots can push against it. For ideas, see our guide to retaining wall plant ideas and our hillside backyard landscaping ideas.
Frequently Asked Questions
How tall can a retaining wall be without a permit?
It depends on your local code. Many areas require permits and engineering for walls over 4 feet measured from the bottom of the footing, and for shorter walls (often over 24 inches) that support a slope, driveway or structure. Check with your building department.
How deep should the base of a retaining wall be?
Use at least 6 inches of compacted crushed aggregate, and bury the first course of block at least 6 inches below grade, more for taller walls or sloping ground.
Do I need drainage behind a retaining wall?
Yes. Every wall needs clean drainage stone behind it, and taller, reinforced or wet-site walls also need a perforated pipe vented to daylight.
When do you need geogrid?
When the wall exceeds the gravity limit for your block, usually around 3 to 4 feet, or when it supports a surcharge such as a slope or driveway. Follow the manufacturer’s engineering charts.
What is the cheapest retaining wall material that lasts?
Timber is usually cheapest upfront but lasts about 20 to 40 years. Segmental block costs more but lasts much longer and is the most DIY-friendly long-term option.
Can I build a retaining wall on a slope?
Yes, by stepping the base down in level sections and burying each step properly. On steep slopes, terraced walls or professional design are often better.
The Bottom Line
A durable retaining wall comes down to a compacted, level gravel base, a buried first course, clean drainage stone with a pipe where needed, and compaction in thin lifts. Stay within DIY height limits and bring in an engineer for taller or loaded walls. For more outdoor building ideas, see our hardscape projects guide, lakefront landscaping ideas for shoreline slopes, and the full landscaping section.
Sources
- Los Angeles County Public Works, Residential Code Manual R404.4: Design of Retaining Walls (when IRC-based codes require engineered design: more than 48 inches of unbalanced fill, or over 24 inches with a surcharge).